Every year there's a wave of folks preserving persimmons by making hoshigaki. As with all the investigations here, we wanted see where the core method would take us with what we had on hand.
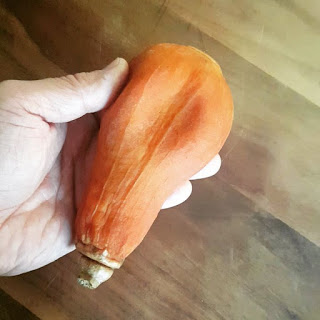
We decided to try something outside the box. A tiny butternut squash happened to be in our Farmer Dave's CSA share. Why not?
The first step of hoshigaki is to peel the skin to make the fruit conducive to drying. That's easily done, but of course a butternut squash isn't quite the same as a persimmon. One big difference is the sugar content. The key to the preservation is the sugar concentrating as it dries. Based on a quick nutritional facts search, butternut squash only has a couple percent of sugar and persimmon clocks at 13%. Not even close. So how do we get there?

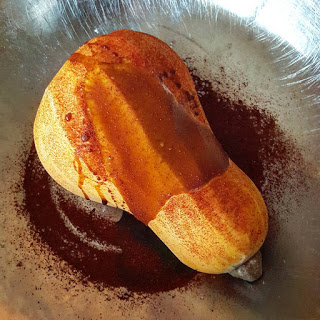
To bump up the sugar percentage, we vacuum packed molasses and turbinado sugar with the peeled squash for infusion.
After a few days in refrigerator, we took the squash out of vac bag. It was pretty wet. We decided to put the squash in the dehydrator to dry off the exterior prior to hanging. The other reason for doing this is to quickly create the skin that's typical of the beginning stages of hoshigaki. Also, there's no way we're getting it sun dried here in New England this time of year.
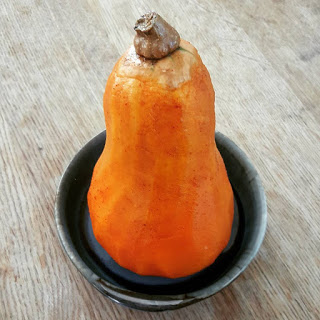
The overnight stay in the dehydrator at 135 F worked like a charm. We had a nice permeable and flexible skin that allows for massaging as the squash dries. Scary close to the beginning stages of hoshigaki.
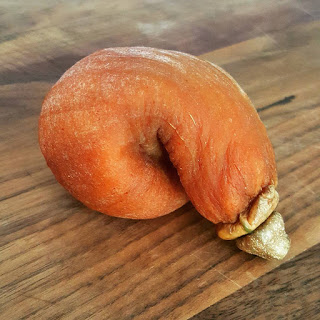
The squash isn't quite done at this point, but it looks, smells and feels promising. The hard flesh in the neck section is breaking down, which was a concern. Very pleasantly surprised that it worked out. It's these unexpected successes that keep us all interested and creating. In case you didn't know, we're already onto experimenting with onion.
As always, please share your discoveries so we can keep the ideas bouncing.
We decided to try something outside the box. A tiny butternut squash happened to be in our Farmer Dave's CSA share. Why not?
The first step of hoshigaki is to peel the skin to make the fruit conducive to drying. That's easily done, but of course a butternut squash isn't quite the same as a persimmon. One big difference is the sugar content. The key to the preservation is the sugar concentrating as it dries. Based on a quick nutritional facts search, butternut squash only has a couple percent of sugar and persimmon clocks at 13%. Not even close. So how do we get there?
To bump up the sugar percentage, we vacuum packed molasses and turbinado sugar with the peeled squash for infusion.
After a few days in refrigerator, we took the squash out of vac bag. It was pretty wet. We decided to put the squash in the dehydrator to dry off the exterior prior to hanging. The other reason for doing this is to quickly create the skin that's typical of the beginning stages of hoshigaki. Also, there's no way we're getting it sun dried here in New England this time of year.
The overnight stay in the dehydrator at 135 F worked like a charm. We had a nice permeable and flexible skin that allows for massaging as the squash dries. Scary close to the beginning stages of hoshigaki.
The squash isn't quite done at this point, but it looks, smells and feels promising. The hard flesh in the neck section is breaking down, which was a concern. Very pleasantly surprised that it worked out. It's these unexpected successes that keep us all interested and creating. In case you didn't know, we're already onto experimenting with onion.
As always, please share your discoveries so we can keep the ideas bouncing.