Miso Mason Jar Pressure Containment, Screw the Weights

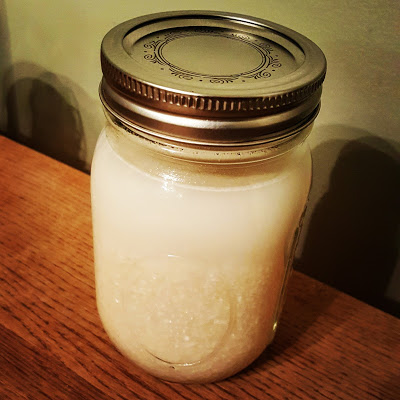
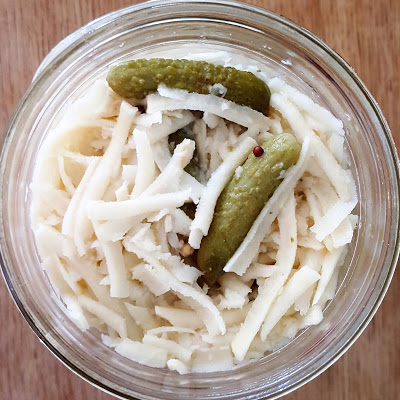
Figuring out how to weigh down the tops of small batches of miso is a bit of a pain. Of course, a compacted medium is best for the fermentation process. Here's a straightforward method for accomplishing the compression with a standard wide mouth Mason jar and lids. 


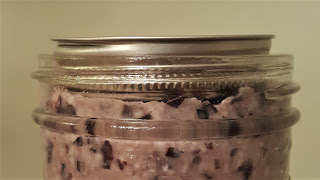
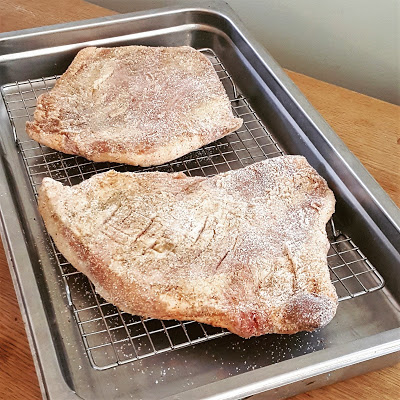
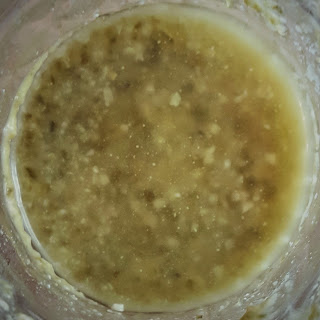
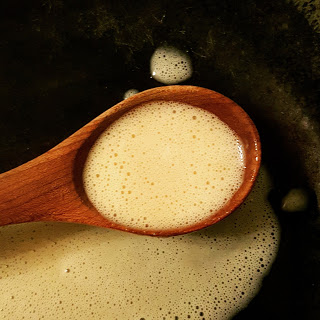
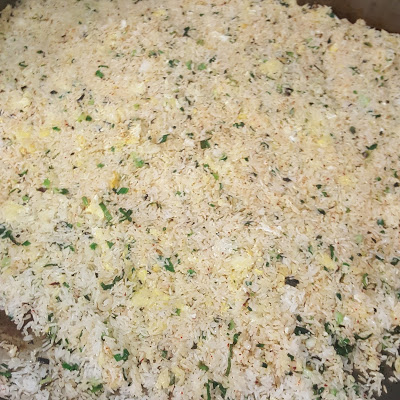
Compact the miso as you would normally to get as much air out as possible. Fill until the compressed paste line is as seen above. Check the level by placing a regular sized lid that just fits inside the wide mouth jar with the lid against the miso and ring on the top. The ring must be above the top of the glass to create the surface pressure.


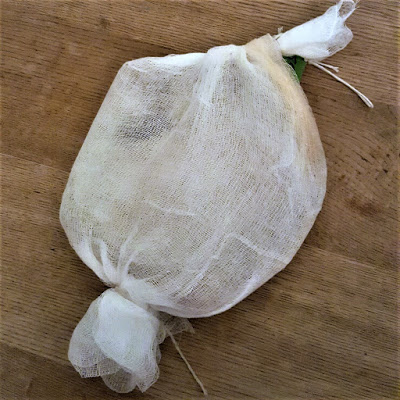
Bag the lid and ring to prevent rusting from the salty environment. Make sure the lid is still outside of the ring. If you use a plastic top, you can skip this step.


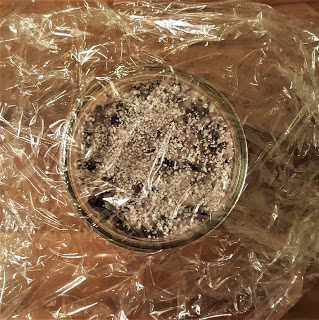
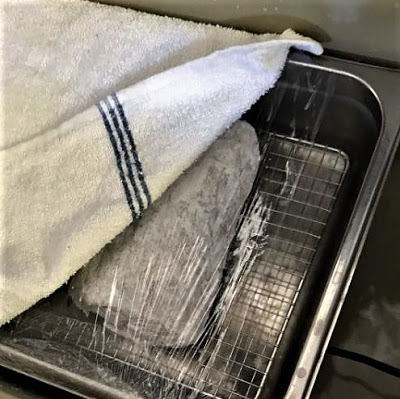
Put two layers of plastic wrap over the mouth of the jar with at least one inch of excess all around.


Compress the bagged lid into the jar to force the plastic wrap to squeeze around the jar lid and ring.


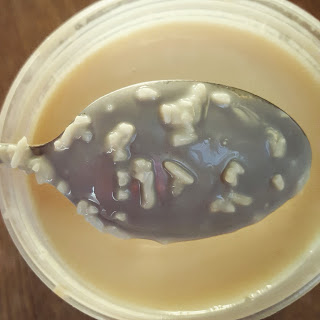
Gather all of the plastic and bring it into the center of the lid ring then put the wide mouth lid over it. Push the lid down onto the jar as you tighten the ring until it just engages and compresses the miso. If you can't engage the ring, you will probably need to remove a small amount of the paste.


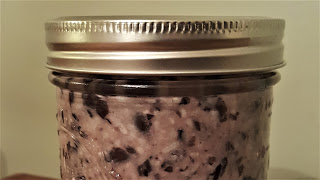
When you're done, the top must not be sealed. There has to be a gap for the future carbon dioxide created to escape or the vessel will pressurize and potentially explode. Also, don't forget that the tamari (liquid) will start coming out of the jar as it ferments so make sure to account for that.

Coming up with a simple solution with readily available parts that don't need modification is pretty great. Sometimes the answer is this easy.

As always, please share your discoveries to keep the ideas bouncing.

Shio Koji Burger, Umami Magic

I recently met with my friends, Alex and Aki, of Ideas in Food to share knowledge on the subject of koji. We had a conversation a couple years ago on the potential for an idea exchange, which lead us down this tasty rabbit hole together.

Shio Koji Cheese Burger Pizza

This all started a while back when I brought over some homemade koji and miso for a tasting. They appreciated the flavors coaxed from the combinations I shared. However, Alex's biggest hang up with everything that's made with koji is the overpowering characteristic flavor. To my understanding, a key concept of Ideas in Food is to make food better than itself. So what does that mean? For example, a steak should taste like the most delicious beefy steak you've ever had, not a miso steak. Not an easy feat.


Jasmine Rice Shio Koji
We were sitting in the kitchen milling over potential experiments then Alex broke out his brown rice & barley shio koji. I also happened to have a Jasmine rice version on hand. It only made sense to see if we could leverage the umami magic while pushing the "soy sauce" flavor into the background.

Shio koji is a Japanese meat marinade powered by enzymes to break down proteins into delicious amino acids, umami. It consists of a slurry of rice/grain koji, water and salt that has fermented for a week or two. The cool thing about applying shio koji to meat is that it produces flavor depth that by default matches the base product.


Just Formed Burgers: Brine, Barley, Jasmine and Brown Rice Shio Koji
We gave some thought to what would dial back the koji flavor and still produce enough depth. The straightforward answer was to use as little as possible. Considering that, optimizing the effectiveness of the marinade was important. Surface area contact is a driving factor, so it only made sense to use ground meat. Hence, the umami burger experiment...


Burgers Post Overnight Marinate
We started by tasting the three marinades (barley, brown & Jasmine rice), which all had unique flavors ranging from the former as the most complex to the latter as sugar forward. We used a 10:1 ground chuck to shio koji ratio and mixed it together. For our control, we used a brine to match the 1% salt content of the other burgers.


Brine Burger in the Back, Jasmine Shio Koji in the Front
Upon grilling, there was an obvious indication of which burgers had the shio koji treatment. Clear charred markings as a result of the caramelization of sugars from the grains. 


Shio Koji Burgers Ready for Tasting
Finally, after all that effort, we tasted the results. It worked pretty well for our first try. The umami level was pushing the limits in all of the shio koji burgers. Also, we could taste a transformation of the base koji grain flavors married with the meat. The Jasmine sweetness was the least favorite. To my palate, the brown rice had nutty notes and barley tasted mushroomy.

At the end of the day, this concept has shown great promise and it won't take many more iterations to make the burger of your dreams.

As always, please share your discoveries to keep the ideas bouncing.

Kojify All the Meats, Old is New Again

Curing meat with koji was on my list of for a long time. I first learned about this technique when I watched my friend Jeremy Umansky's TED Talk. It involves growing aspergillus oryzae (AKA koji-kin) directly on the surface of meats. The enzymes that are produced accelerate aging and dry curing to complete in much less time than traditional methods. A truly brilliant application that was literally unbelievable.

Mini Koji Cured Coppa
For our first crack at charcuterie, my friend Nicco Muratore had a coppa that just finished salt curing. He was happy to hand it over for the trial run. I followed Jeremy's method and it finished drying in 14 days. Truly amazing! To Nicco's palate, he didn't even really taste koji influence. I'd say that's a win.

If you're interested in trying to koji cure with a whole muscle cut, below is the basic step by step roll through. This assumes that you have already successfully made rice/grain koji. If not, I strongly recommend making rice koji first as a learning building block as to prevent ruining a nice piece of meat.

Whole Muscle Cut Koji Curing Method

Post traditional salt curing, rinse and pat dry your meat as you would prior to hanging.

Jon Broida of Japanese Knife Imports Rice Flour Coating a Ribeye
Set up a coating station that consists of two plates or bowls and a resting rack that will comfortably hold the size of the meat you are working with. The first plate/bowl will be for sprinkling a light coating of rice flour cut koji spores, what's normally used for koji making, onto the entire exterior of the meat. The amount you apply is as if you were seasoning the meat. You do not need very much so use it sparingly. The second plate/bowl is to coat and pack the meat with rice flour. The rice flour is food for the koji-kin to flourish. 


Koji-Kin and Rice Flour Coated Five Spice Guanciale
Once you have completely covered every surface with koji spores and rice flour, place the coated meat on the wire resting rack in a container that will fit in your incubator. 


Plastic Wrap & Kitchen Towel Cover (Photo by Andy Doubrava of Rustic Canyon)
In most cases, you will need to suspend a cover over the meat so condensation does not drip onto it. If you're using a cooler incubator setup, a simple solution is to plastic wrap around your container with a kitchen towel on top. Remember to leave openings on the sides to allow for the humidity to flow through.


Koji Bloom on "Koppa" (Photo by Jeremy Fox of Rustic Canyon)
Allow your charcuterie to incubate at between 80 to 90 F (27 to 32 C) at high humidity for 48 hours. I understand that these conditions may make you nervous, but keep in mind that the meat already has the advantage of having been salted. On top of that, aspergillus oryzae has an amazing ability to inhibit undesirable microbe growth once it takes hold. 


Koji Coated Five Spice Guanciale in Cheese Cloth
Once the meat has a snowy layer of mold bloom, wrap it in a couple layers of cheese cloth and hang it as you would under the conditions specified by the traditional method. Allow it to dry to the weight or other indications as specified in the recipe. Keep in mind that it may end up being half the time thanks to the crazy enzymes! 


Koji Cured Five Spice Guanciale
At the end of the day, I'm not claiming that koji accelerated curing yields the same product as the traditional method. It's just different and too freaking delicious to pass up. Get at it!

Before you get started, please watch what inspired me to head down this delicious rabbit hole. Jeremy Umansky's information packed lecture on koji aging and curing meat!

As always, please share your discoveries to keep the ideas bouncing.

Miso Method Dairy Amino Sauces

Based on the success with ricotta miso method cheese creating a Parmesan like flavor in a month or so, I've been trying all sorts of dairy based amino sauces. The examples below are among the most delicious combinations I've discovered so far. I hope they inspire you to develop your own. 


Cayenne Yogurt Amino Hot Sauce
(Flavor Profile: Spicy Pimento Cheese)

Jalapeno Yogurt Amino Hot Sauce
(Flavor Profile: Jalapeno Popper)

Yogurt Amino Hot Sauce Method
By weight, mix two parts yogurt, one part pureed hot peppers, three parts fresh koji and 5% salt against the total. Follow the same containment conditions as you would for miso. Ferment for at least one month in a cool basement or two months in the refrigerator. Keep in mind that there's risk for rancidity due to the fat content, so cool/cold conditions are important for success. 


Buttermilk Sweetened Condensed Milk Amino Sauce
(Flavor Profile: Creamy Sweet Soy Sauce)

Foamed Buttermilk SCM Amino Sauce

Follow the same process above with a mix of three parts buttermilk, one part sweetened condensed milk and four parts fresh koji with 5% salt against all the ingredients. Fridge ferment for at least two months. Foaming the sauce lightens the salt delivery in a dish. Soy lecithin and an immersion blender was used to suspend the bubbles seen above.


Fresh Jasmine Koji and Whey Protein Powder

Whey Protein Amino Paste
(Flavor Profile: Umami Nacho Cheese Sauce)

In the interest of boosting accessible protein to the protease enzymes to create as much umami as possible, I decided to use whey protein powder. It is 75% protein by weight! The mixture was made with equal parts whey powder and fresh koji. Add enough water to make a paste and 5% salt against the total weight. After only five weeks of fermentation, it tastes like a nacho cheese sauce. Crazy!

Now get out there and make a new miso method amino sauce with any protein base you desire. No limits!

As always, please share your ideas to keep the ideas bouncing...

Elements of Kojify the Dinner

Introduction


Microbiologist Ben Wolfe gave a presentation and showed guests our koji
growing with his microscope. Yes, that's Cynthia Graber of Gastropod.


First Course


Kvass fermentation kick started with raw honey.

Schmaltz Richness + Stock Depth + Earthy Beet Kvass = Killer Borscht

Sweet Tart Beet Koji Pickles (Bettarazuke Spin)

Horseradish pickled in gherkin brine smoothed out the harshness.

Schmears of horseradish gherkin cream with beet bettarazuke waiting for borscht.


Second Course


Dried Ricotta Miso, The Next Parmesan

Miso Garlic Lacto-Fermented Sunchokes for a Tart Crunch

Nicco's Ricotta Miso Agnolotti Making Focus


Of course incorporating fresh and dried ricotta miso worked well.


Third Course


Jasmine Shio Koji Marinated Hake
Crazy delicious combination of caramelization, Maillard & umami.

Extra Crunchy & Chewy Fried Rice
Powered by "al dente" cooked rice inspired by the koji making process.

Thai green curry hollandaise over the hake made this dish sing.

We hope all the guests of Kojify the Dinner enjoyed their experience and now better understand the versatility and delicious power of koji. Maybe we inspired you to create new fermentation based flavors as we built and executed this menu. Please share them with us to keep the ideas bouncing.

The intent of this event was to kick start our initiative to teach cooking methods. If you're interested in signing up for a workshop, sharing ideas and/or collaborating, check out our brand new official website. Just a cover page with links, but it does the job for now.